2022/5/26
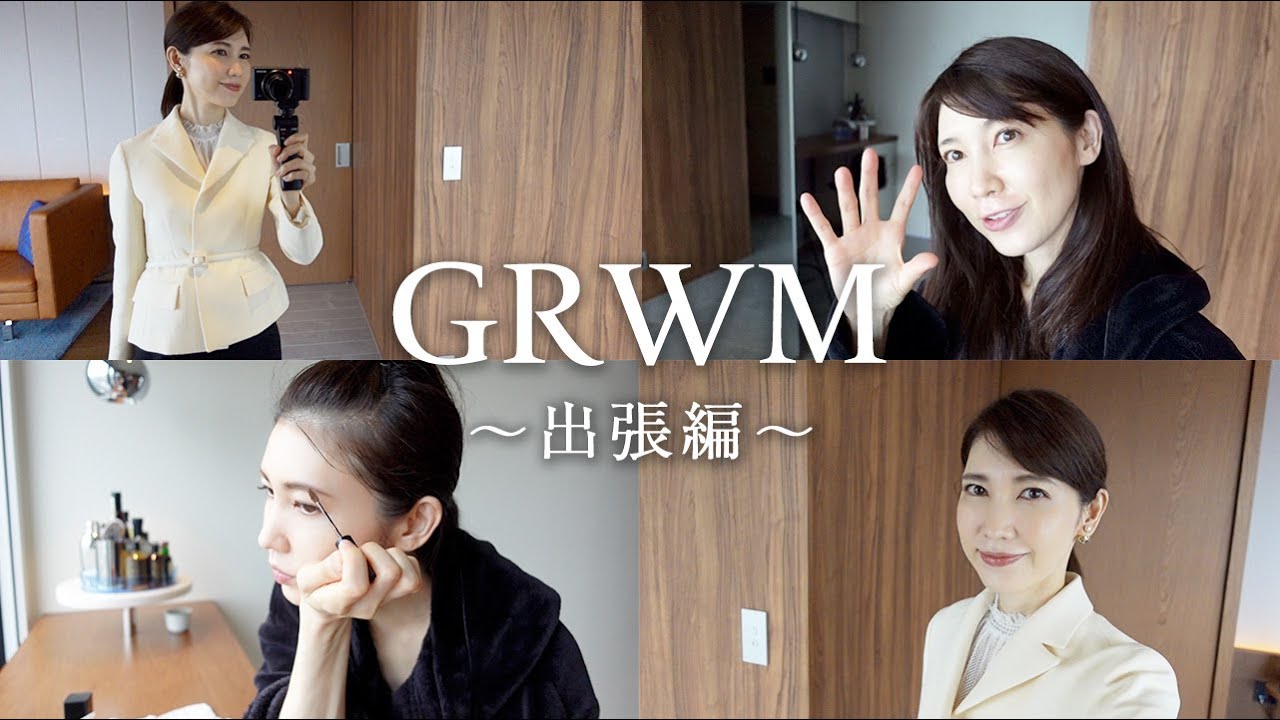
【GRWM】友利新のGet Ready With Me 〜出張編〜
文字起こし(日本語)
おはようございます。今日はこれから実は大学の先生をすることになっておりまして、大学で講義をしていきます。以前も自分のね地元の琉球大学で先生やったこともあるんですが、今回は大阪の女子大の先生ということで緊張しております。なので今日は先生ファッションじゃなく、キリッとした先生モードにならなきゃいけないので、そんな朝のモーニングルーティーンをお送りしたいと思いますのでよろしくお願いします。では早速始めていきます。ということで朝のスキンケア、まず洗顔から始めていきたいと思います。今回できたスキンケアのポイントっていうのは、生徒さんにお会いするじゃないですか。初めての生徒さんにお会いするから、できるだけ肌の血流というか肌の巡りをアップさせたくて、美白というよりは朝水分しっかり入れながら透明感を出していく。やっぱり巡りが良くないと血行が悪いと顔色がよく見えないので、血流を良くする。プラス移動するんですよ大学の方に。その間ずっとマスクしてるのでメイクがね毛穴落ちしたりとかしないように毛穴ケアをしつつ、巡りを良くして透明感アップさせたいなと思うスキンケアを今回は選んでみました。ではまず早速洗顔からしていこうと思います。今回持ってきた洗顔はこちらです。エストのクラリファイングジェルウォッシュになります。深掘り動画でも説明したんですけれども、これには花王の角栓溶解技術の最新版が入っています。実は毛穴っていうのは詰まって一つ酸化するとね、ドミノのように全部ワーッと酸化してしまう。それによって急済みとかですよね起こってしまうということがわかってきて、それで毛穴が開くとかっていうことがわかっているので、生徒さんにお会いするのでこれで透明感を出していこうかなと思います。揺らしてから洗顔をこんな感じで伸ばすような感じで、撫でるような感じでやれば、そんなに強く落ちているという感じではないでした。早速流していきます。そんなに突っ張る感じがないんですよね。本当になんかツルッともちっとします。もちろんすぐスキンケア始めるんですけれども、そんなにすぐに入れなくてももちがいいというか、そんな感じになっています。一番最初に使うのはこっちです。これはソフィーナIPのベースケアセラムで、これ炭酸で出てくる導入なんですね。炭酸って通常はLPガスみたいなただ泡を出すものが多いんですけれども、花王のソフィーナさんは炭酸の泡を細かくする技術を持っていらっしゃって、泡の美容液をいっぱい出しているところはあるんですけれども、本当に炭酸の泡が肌に浸透していっているって実はありそうでないんですよね。それをしっかりと研究して出しているのがこの花王グループになります。泡を出した時にはまだ炭酸の泡が弾けないんだけど、肌に乗せた時に弾けるような設計をとっているっていうのも、やっぱり花王さんならではだなと思います。乗せるとね温かくなるというか血流が良くなるのがわかるんですよね。こんな感じで泡で出てくるタイプになります。泡パックというよりは泡の美容液なんで、乗せた後にギュッギュッと入れ込むような感じで美容液みたいに変わっていくんですよ。これでギュッギュッギュッと入れていく感じになります。炭酸の泡をしっかりと肌に馴染ませていきます。そこに化粧水入れていこうと思うんですけれども、こちらになります。石澤研究所のクリアウェルネスピュアコンクのシートマスクです。石澤研究所のピュアコンクの化粧水自体はもう発売されていると思うんですけれども、それがシートマスクになってます。ピュアコンクがしっかり入っていて、ピュアコンク自体も割と機能に強化するようなものになっているので、夜って美容液効果のあるシートマスクを入れる方がいいと思うんですけれども、朝はお水をしっかり入れてあげたいんですよね。角質にお水がたくさんあることによって皮脂分泌が抑えられてケアの落ちが防げられたり、あとは肌に透明感が出るので、朝ってこういう化粧水タイプのシートマスクをしてあげる方がいいかなと思っています。今はちょうど6時ですけれども、まだ出発が8時半くらいかな。だからもうちょっとだけ、今日ご飯を作らなくていいのよ。子供たちの用意もしなくてもいいっていう自分だけの時間って、なかなかないですからね。なので贅沢にも朝シートマスクをしたいと思います。さっきのエストで巡りをよくして、はい、これで、お水いっぱい入っていってね。はい、ちょっとこれで5分ほど置きたいと思います。じゃあ5分経ちました。じゃあ取っていきます。はい、うんしっかり入ってますね。いい感じです。シートマスクしたところで通常だったら化粧水いいかなとは思うんですけれども、もう一個だけ化粧水重ねたいなと思うのがこちらです。ポーラのBAローションイマースです。これは最近YouTubeでも深掘りして、汗による毛穴の浸透、それによってくすんだりとかっていうことを改善してくれるようなローションになります。毛穴って黒ずみだけってイメージだったんですけれども、汗がまさか浸透とか酸化とかに関係して、それで毛穴が開くとか顔が黒くくすむとかってことがあるなんて、本当にこのBAの研究で初めて知ったので、今日ねちょっと大阪は曇ってるんですけれども、22、23度くらいまでは一応上がるらしいので、絶対マスクの中汗かくなと思うので、これで対策しておこうかなと思います。つぶしぐらいかな。毛穴が気になるところに乗せた後に、顎も結構汗出てざらつくよね。目の周りとかもちろんそういったところいいと思うんですけれども、私はこういう毛穴が気になるところに汗しっかりと入れる、汗対策をちゃんとしていこうと思います。化粧水まで終わりました。目の周りがくすんでたら嫌だなと思ったので、目の周りにはこちら、SK-IIのジェノプティックアンダーアイサークルです。ジェノプティックシリーズっていうのが寝不足とかでできる、ビリルビンっていう黄色い成分というかあるんですけれども、体の中で寝不足だとこのビリルビンが増えるっていうことがわかっていて、改善させるのがこのジェノプティックシリーズなんですね。目の周りとかむくみだったりとか、あとは艶感がなくなったら嫌だなと思って、これねこんな感じでボールがあってこれちょっとヒヤッとするんですよ。だからこれをつけてヒヤッとするのね、なんかこれで気持ちいいんですよ。こういうボールがついているものって摩擦にならないんですかという方もいるんですけれども、ソフトタッチをちょっとつけてあんまりゴリゴリはしないような感じで、ほんと気持ちいいのね。だからなんか目の周りがスッキリと起きる感じもするし、これで目の周りやっぱりどうしても乾燥をするからね、しっかりとケアしていきたいと思います。ほぼほぼこれで完成なんですが、一応ねビタミンCは入れておきましょう。スパトリートメントのリアルシーセラムです。ビタミンCはね当たり前ですけれども朝晩しっかりと入れていきたいと思いますので、乾燥が気になるところ、シニが気になるところにもつけて、全体に塗っていきます。どうですかね、いい感じになってますかね。これでほぼほぼ私のスキンケアというか終わりなんですけれども、一応美容液まで塗ってこれで真夏とかは私はこれで終わることも多いんですけれども、まだねもう少し蓋をするようなスキンケアしたいなと思って、今日はこちらの乳液を出してみようと思います。ディオールのプレステージの乳液になります。これもYouTubeでね深掘りしたと思うんですけれども、ナイアシンCDというディオール独自のナイアシンアミドが入っていて、ナイアシンアミド自体も美白ですけれども肌荒れ防止だったりとか、私は改善ということで、あとねやっぱりこのナイアシンアミドだけじゃなくてプレステージシリーズには、そもそもこのディオール独自のローズの成分がしっかり入っていて、それが高抗炎症作用だったりするんですね。ほんと肌にパッと透明感を出す。私は本当にベタベタするものを朝塗っちゃうと、皮脂崩れがひどいんですけれども、乳液なんですがそこまでベタベタしない。ちょっとしっかり保湿はうまくは張ってくれるんですけれども、そんなにテカテカしない。だからしっかりと朝塗っても、私みたいな皮脂テカさんにもそんなに邪魔をしない、優秀な乳液になります。なのでこれぐらい、ほんとちょっと取って、目はね気になるので目の周りや耳に。今日のスキンケアはこちらで完成になります。これでだいぶ透明感出たかしら。
スキンケアはバスルームでやってたんですけれども、バスルームちょっと暗いのでメイクは窓際でしようかなと思ってます。見てくださいこんな感じでバーカウンターがあります。大阪の素敵じゃない。こんな感じで、景色を見ながらバーができるというここでね作業とかもしてもいいと思うので、ここでメイク窓際でね自然光でメイクしていきたいと思います。ではメイク始めていきたいと思います。まずはやっぱりベースよね、日焼け止めですね。ラロッシュポゼのUVデフェンスXL プロテクショントーンアップのクリアを塗っていきます。クリアをこの鼻のところをTゾーンに塗っていこうかなと思ってます。YouTubeの深掘りでも言ったんですけれども、日焼け止めもしてくれながら輸出もするんだけれども、皮脂を出すのを抑えてくれるようなものになるので、あとトーンアップがそこまでピンクっぽくはないので、おでこと鼻下と顎の方に塗っていこうかなと、これでこの中心部のテカリをなくしていくような感じにします。他のところ顔全体はラロッシュポゼのUVデフェンスXLローズを塗っていきたいと思います。まだねそんなに汗がだらだら出るっていう感じでもないので、あと補正効果っていうことも狙って全体的にはピンクのトーンアップをさせていって、やっぱり何回も言うんですけれども私みたいな40代になってくるとくすみが出てくるので、ピンクで飛ばしてあげた方がいいのでちょっと塗っていきたいと思います。これだけでも結構いい感じになったんじゃないでしょうか。次にファンデーションにいきます。ファンデーションは今日は透明感をスキンケアでしっかり出すようにしたので、メイクはそこまで厚塗りじゃないんだけれども肌を綺麗に見せてくれるっていうアイテムで選びました。それがこちら、コスメデコルテの全ウェアフルイドリキッドファンデーションです。こちらも本当に軽いんですよね。顔料がすごく均一に塗る感じで、なんかあれ一瞬ファンデーション塗ってないのかな、この人肌綺麗なのかなと思わせてくれるようなファンデーションなので、こちらを塗っていきます。ファンデーション私はね本当に少量だけ塗っていくような感じにしてます。少量でも伸びるから、ちょっと塗ったものを伸ばしていくだけでいいファンデーションですね。このフェイスラインのところはあんまり私塗らないですね。この中心のファンデーションがこの辺に余ったものが伸びていけばいいかなっていう感じで、ここまでフェイスラインまでは塗らないです。どうですかね、ここファンデーション塗ったとこ、肌のとこやっぱりちょっとこっちの方が肌の補正ができているかなと思いますけれども、そこまで塗りました。ファンデーションやってますみたいな感じじゃなく、本当にナチュラル感が出るんじゃないかなと思います。じゃあ全体的に塗っていきます。こんな感じでファンデーション全部塗り終わりました。今日もコスメデコルテのフェイスパウダーになるんですが、これ確かねちょっと小さいじゃない、これ持ち運びのやつ。クリスマスコフレだったかな、何かについていたアイテムだと思うんですよね。なのでもしかしたらもう出ないかもしれないです。それをちょっとポンポンポンポンと塗りました。眉毛のところがピンクっぽいところなので、こんな感じピンクっぽい色になります。全体的にっていうよりは、眉毛今から描くのでこの辺りを。じゃあ次は眉毛を描いていこうかな。眉毛は私は最近はこのエクセルのペンシル&パウダーアイブロウを使ってます。すごいね描きやすいし、なぜこれを見つけたかっていうと、メイクさんに教えてもらいました。ここから眉毛がないんですよ。でもここは結構生えているから、まずスクリューブラシで毛を立たせて、ここに合わせて描いていきたいと思います。眉毛と目の間が狭いじゃない。だからこの下のアウトラインを描いてから全体的にやっていきます。やっぱり眉毛って本当に印象変えますもんね。私眉毛の眉頭が結構あるので、ガッツリ描いちゃうと描きましたみたいになるので、そこを上に一本一本描いているような感じで、ここだけはどうしてもアウトラインを描かないとぼかしていけないので、ここだけはアウトラインを描くんですが、ここぐらいまでだよっていうアウトラインを描いたら、あとは一本一本つけ足していくような感じで。そこにアウトラインを描いたらこちら、もう使いすぎですね。ケイトのデザイニングアイブロウ3D。私はEX05番を使ってます。これで全体的に塗っていこうと思います。こちら使ってます。白黄土のブラシですね。こういう感じで先が丸くてパウダーがしっかりとつくようなもので、最初はこのなくなりかけなんですけれども、この薄い色で描いていきます。ここは前頭が結構あるので、眉尻の方と上の方を足していく感じです。ペンシルだけじゃなくてこういうパウダーを使うと、ふわっと優しい眉になってくれるかなと。こうやって見て描いちゃうと濃くなっちゃうので、ちょっと引きながら足りないところを埋めていくようなイメージでやるといいんじゃないかなと思います。こんな感じでちょっと描きすぎちゃったのと、動かしていかがでしょうか。こっちはできて、まだこっち、これから描いていきます。はい、どうでしょう、わかるかな。こんな感じでふわっとした眉毛に仕上げてみました。これだけでもいいんですけれども、どうしてもこの眉頭と眉尻の色がちょっと微妙に合わなかったりするので、またこのケイト3Dアイブロウカラーの私はBR1番で、一回ちょっとつけたらティッシュで一回オフして、これを立てるようにねちょっと眉頭のところの濃い毛を、色をね柔らかくして、そもそも私眉頭だけ濃いですよみたいなことを隠すような感じで、そうするとちょっとふんわりいい感じの眉毛になってくれます。そしたらアイカラーに行こうと思うんですが、そこまで派手じゃないんだけれどもちょっと透明感も出したいなと思って、悩みに悩んで2つ持ってきました。1つがこちら、ジルスチュアートのブルームクチュールアイズの04番。これめちゃめちゃ可愛いよね。こんな感じのものになってます。この色を使いたかったのが、細かーいラメが入ってるんですけれども、そこまでギラギラしたラメじゃないので、この上の色をラメを使っていきたいと思います。やっぱり第一印象ってすっごく大事だと思うのよ。一番最初にあった時にこの人派手だなあとか思われるのも嫌だし、でも手抜きしてるなと思われるのも嫌じゃない。こんな感じでちょっとここはまだ塗ってないです。こんな感じで全体的に奥行きを出していきます。今日はねやっぱり先生ということで、キリッと仕上げるっていうようなところもあるので、2つ目がこちら。フジコのタシパレのオリーフカウォーム01番のオリーフカウォームを使っていこうと思います。それの一番左このこの色とここの色を、一番端っこ端っこを使っていきたいなと思います。なんかタシパレはね本当に優秀で、パッと見はちょっとどうやって使えばって思うかもしれないんですけれども、本当タシパレっていう名前だけあって、足していくのが結構いいかなと思います。どうですか?結構奥行きが出てこれだけでもアイメイクいい感じになっているような気がしますが、下まぶたにも。いい感じ。アイラインを引いていきます。アイラインはラブライナーのリキッドタイプを使っていきます。こういうちょっと明るい茶色ですね。これを全体的に塗っていきます。最後はこう、ちょっとだけ長めに引いていこうかな。こんな感じで何もしてない目と、アイライン引いた目と、やっぱり違いますよね。ちょっと角度変えてみました。こっちがアイシャドウを塗ったとこ。ここはまだ塗ってないのでやっぱりこっち側かなと思います。反対側も塗っていきたいと思います。どうでしょう、これでアイシャドウ、いい感じでいけたかなと思います。今まではこれで終えてたんですけれども、最近私は鼻に凝ってるんです。鼻がね私どうしてもここ丸いじゃないですか。立体的に見せたいなと思って、マリリンさんにメイクしてもらった時の鼻が忘れられなくて、ノーズシャドウに最近ハマっております。セザンヌのミックスカラーチークなんですけれども、このチークがねここの2つがノーズシャドウに本当に最適でありまして、付属のチップもねすごく良くて、この2つねここはちょっと濃いよ、この2つちょっとこっち寄りで、こういう風につけて、この私の眉頭とこのちょうど鼻の入り口のところに、こうつける。ここにつける。ほら、これだけでもちょっと立体的になったと思います。ここにつけた名残でシュッと下ろしていく感じ。これだけでもちょっと立体的になった感じしません。でそこに、この鼻の丸いところは、このちょっと小鼻を小さくするために、こういう感じに塗っていく。ちょっと仕上げていきますね。どうでしょう、立体的になったと思わない?ちょっと小鼻も小さくなったような感じが気持ちいいしませんか?ただこれで終わるとここのノーズシャドウとここのファンデーションの色が空いた感じで、いかにもノーズシャドウを塗ってますっていう風に見られるので、ファンデーションを重ねた方がいいっていうことを教えてもらったので、マックのパウダーファンデーションで、この辺を馴染ませるような感じにしていきます。こんな感じで鼻も立体的になりましたよね。そこでこの一番明るいこちらを、ハイライトで入れる。鼻先にちょっと入れる。ほら、そうすると鼻が、シューッとなったような感じがしませんか?いい感じですね。最後はチークを入れていきます。今日のチークはボビーブラウンのグラッシュドクリーミーカラー フォーチークス&リップスの、10番ラテっていう色を使っていきます。これはチーク&リップスっていうぐらいなので、リップにもチークにもなります。こういう色です。ダイレクトに塗るよりも、手でねちょっとぼかして、ニッて笑ったこの辺から、外側にかけて塗ってあげる。なんかこうジュワッと血色があるような。そこをこれでなんとなくお顔が立体的に見えてきたかなと思います。じゃあ反対側も塗っていきます。どうでしょう、立体的になったかな。はい、これでメイク完成しました。じゃあ髪の毛整えてお着替えして、リップを最後に塗って、完成しようと思いますので、少しお待ちください。はい、着替えてきました。全身がこんな感じです。白いジャケットにしてみました。やっぱり先生っぽく、ジャケットがいいかなと思って、こちらベルトがねいい感じに、ウエストを細く見せてくれる。これはディオールのバーチャケットになります。パンツはパトゥーというところになります。ということで今日は、モーニングルーティン撮ってみました。ちょっとね先生っぽい感じの、仕上がりになったかなと思います。次回からこういったものを、楽しみよっていう感じだったら、ホテルステイでできる時が来たら、やりたいなと思います。それでは皆さん行ってまいります。
Transcript (English)
Good morning. Today I'm actually going to be teaching at a university, giving a lecture. I've taught before at Ryukyu University in my hometown, but this time I'll be teaching at a women's university in Osaka, so I'm quite nervous. So today I need to be in serious teacher mode, not fashionable teacher mode, so I'd like to share my morning routine with you. Please enjoy.
Let's start right away with skincare. First, I'll begin with cleansing. The key point for skincare today is that I'll be meeting students. Since I'm meeting students for the first time, I want to boost skin circulation and bring out translucency rather than focusing on whitening. I want to maintain good blood flow and hydration in the morning because blood circulation really affects how your complexion looks. Plus, I'll be traveling to the university and wearing a mask the whole time, so I need to care for my pores to prevent makeup from settling into them. I want to improve circulation and boost translucency, so I've chosen skincare with that in mind. Let me start with cleansing right away. The cleanser I brought today is this: Ésthe Clarifying Gel Wash. As I explained in the deep dive video, this contains the latest version of Kao's pore-clearing technology. Pores actually work like dominoes—when one pore gets clogged and oxidizes, all the pores around it oxidize too. This causes issues like roughness and open pores. So I'm going to use this to bring out translucency for meeting the students.
I'll gently massage it in and apply the cleanser this way, smoothly and gently. It doesn't feel like it's stripping the skin much. Let me rinse it off right away. It doesn't feel tight at all. It actually feels smooth and plump.
Next, I'll start skincare right away. The first product I'm using is this: Sofina IP Base Care Serum. This comes out as a carbonated foam—a treatment essence. While most carbonated products use LPS gas to create bubbles, Sofina has technology to create very fine bubbles. Many brands release bubble serums, but the carbonated bubbles don't actually penetrate the skin that well. However, Kao has thoroughly researched this and developed this product. The bubbles don't burst when dispensed, but they're designed to burst on the skin. That's very characteristic of Kao. When you apply it, your skin warms up and you can feel the improved circulation. It comes out as foam like this. Rather than a bubble mask, it's a bubble serum, so after applying it, you press it in and it gradually transforms into a liquid serum. I'll press it in gently. I'll make sure to thoroughly incorporate the carbonated bubbles into my skin.
Next, I'll apply toner. This is Kiehl's Clear Wellness Pure Conce Sheet Mask. The Kiehl's Pure Conce toner is already available, but this is the sheet mask version. It contains plenty of Pure Conce and is a formulation that enhances its effectiveness, so while I usually prefer a serum-type sheet mask at night for its beauty treatment effects, I want to thoroughly hydrate my skin in the morning. When there's plenty of water in the stratum corneum, it actually suppresses sebum production, which prevents makeup from slipping off and gives skin translucency. So I think it's better to use a hydrating toner-type sheet mask in the morning. It's currently 6 AM and I don't leave until around 8:30, so I don't have to make breakfast or prepare the kids today. I have time just for myself, which doesn't happen often. So I'd like to indulge in a morning sheet mask.
I'll boost circulation with the Ésthe product first, and now I'm applying plenty of hydration. Let me leave this on for about 5 minutes.
Okay, 5 minutes have passed. Let me remove it. Yes, it's thoroughly hydrated. That feels nice. After using the sheet mask, I'd normally stop at the toner, but I want to layer one more toner. This one: Pola BA Lotion Immeruse. This is a toner I deep dived into on YouTube recently that helps improve the barrier function of pores affected by perspiration, which can cause dullness. I thought pores were only an issue with blackheads, but apparently sweat can permeate pores and oxidize, which can open pores and make the face look dark and dull. I only learned about this from Pola's research. Today it's cloudy in Osaka, but it's supposed to reach about 22-23 degrees Celsius, so I'm definitely going to sweat under my mask. I'll use this as preventative care. I'll apply about this much, focusing on areas prone to pores and sweat, like my chin and T-zone. I want to implement proper sweat countermeasures. That completes my toner application. I was concerned about dark circles under my eyes, so I'm using this for the eye area: SK-II Genoptimum Under-Eye Circle. The Genoptimum series addresses bilirubin, a yellow compound that increases with lack of sleep. This product helps improve that. I'm concerned about puffiness and loss of elasticity around the eyes, so I'm using this. This has a roller ball that feels really cool. It feels so refreshing. Some people worry about friction from applicators like this, but with a soft touch and not too much pressure, it actually feels wonderful. It makes my eyes feel more awake and I want to thoroughly care for the eye area since it tends to get dry.
This is almost complete, but let me add vitamin C. This is Spatherapy Real C Serum. Vitamin C is essential morning and night, so I'll apply it to areas prone to dryness and aging, and all over. How does this look? Almost complete with my serum application. During summer I often stop here, but today I want to add an emollient layer, so I'll use this: Dior Prestige Emulsion. As I explained in the deep dive, this contains Niacinol CD, which is Dior's proprietary niacinamide. While niacinamide provides whitening, it also prevents skin irritation and improves roughness. Plus, the Prestige line contains Dior's exclusive rose extract, which has anti-inflammatory properties and creates immediate translucency. I'm very prone to oil breakouts if I apply anything too heavy in the morning, but this emulsion isn't overly rich. It provides solid hydration without being shiny, so even someone like me who's prone to oiliness can wear it without problems. It's a wonderful emulsion. So I'll use just a small amount, especially around the eyes. My skincare is now complete.
I was doing skincare in the bathroom, but it's a bit dark, so I'll do my makeup by the window where there's natural light. Look at this—there's a bar counter. In Osaka, how nice! I can do work while looking at this view. So I'll do my makeup here by the window in natural light.
Let me start my makeup. First, the base: sunscreen. I'm using La Roche-Posay UV Defense XL Protection Tone Up Clear. I'll apply the clear version to my T-zone, focusing on my nose. As I mentioned in the YouTube deep dive, this provides sun protection while also controlling sebum—it suppresses oil production. Since the tone up isn't too pink, I'll apply it to my forehead, under my nose, and chin to eliminate shine in the center of my face. For the rest of my face, I'll use La Roche-Posay UV Defense XL Rose tone up. I'm not sweating heavily yet, and since I want the corrective effect, I'll apply the pink tone all over. As I keep saying, once you hit your 40s, you get dullness, so it's better to brighten with pink. Even this alone looks quite nice. Next, foundation. Since I focused on bringing out translucency with my skincare, I want a foundation that's not heavy but makes skin look beautiful. That's this: Cosme Decorté Tone Wear Fluid Liquid Foundation. This is really lightweight. The pigment blends so evenly that you might think this person isn't wearing foundation—their skin is just beautiful. I'll apply this.
I only use a tiny amount of foundation. It blends so well that I just need to spread a small amount. I don't apply all the way to the jawline. The excess from the center of my face blends down anyway. It provides coverage while looking completely natural, not like I'm wearing makeup. Let me apply it all over.
I've finished the foundation. Now for Cosme Decorté Face Powder—this is a small travel size. I think this was included in a Christmas collection. So it might not be available anymore. I'll lightly pat it on. This area is pink, so it becomes rosy. Rather than the whole face, since I'm about to draw my eyebrows, I'll focus here.
Now for my eyebrows. I've been using Excel's Pencil & Powder Eyebrow lately. It's so easy to apply. I found it because a makeup artist recommended it. This area has no hair, but this area has plenty, so I'll first brush up the hairs with the spoolie and then draw to match. The space between my eyebrows and eyes is narrow, so I'll draw the lower outline first. Eyebrows really change your expression. Since my inner brow naturally has a lot of hair, if I draw too much it looks overdone. I draw individual hairs on top to blend them in. Only this part needs outline definition; otherwise, I'll just add individual hairs. After defining the outline, I'll add individual hairs on top. Okay, I've already used too much. Now I'll use Kate Designing Eyebrow 3D, EX-05. I'll blend everything with this. The brush is white ochre, rounded at the tip with good powder adherence. I'll start with this light shade. Since the front part has a lot of hair, I'll add to the tail and upper part. Using powder in addition to the pencil gives softer, more natural brows. If I'm too close to the mirror it gets darker, so I'll step back to see the overall effect and fill in gaps. How does this look? Got it on one side; still working on the other. Does this look okay? I've created soft, fluffy brows. Usually I'd stop here, but the inner and outer brow colors don't quite match, so I'll use Kate 3D Eyebrow Color BR-01. I'll apply a tiny bit, dab it off with a tissue, and use it to soften the darker, thicker inner brow hairs, concealing the fact that only the inner brow is dark. This creates nicely blended brows.
Now for eyeshadow. I want something not too dramatic but with some translucency, so I've brought two options. First is Jill Stuart Bloom Couture Eyes in 04. This is so cute! This color has fine shimmer, not overly glittery, so I'll use the shimmer shade on top. First impressions are really important. I don't want to seem flashy when we first meet, but I also don't want to look like I'm not making an effort. I'll apply a base shade here. Let me create depth all over. Since I'm a teacher and want a sharp finish, the second option is Fuja Tasha Paleo Leaf Warm 01. I'll use the colors on the far left and edge. Tasha Paleo is really excellent. It might look complicated at first glance, but true to its name, building up the layers works really well. Don't you think? Quite a bit of depth is building up; the eye makeup looks good already. Let me add the lower lash line too. Nice.
Now I'll draw eyeliner. I'm using Love Liner liquid liner. This is a soft brown shade. I'll apply it all over. At the end, I'll extend it slightly longer. Without eyeliner versus with eyeliner, there's quite a difference. Let me angle my face. This side has eyeshadow. This side doesn't yet, so this side looks better. Let me finish the other side. There, the eyeshadow is complete.
Up until now I would have stopped here, but recently I'm really into the nose. Mine is naturally round, and I want to make it look more sculpted. I can't forget the nose the makeup artist Marilynn gave me, and I've become obsessed with nose contouring. Cesàme Mix Color Cheek works perfectly for nose contouring. These two shades are perfect for nose shadow, and the included applicator is great too. This one's a bit dark, so I'll use this one, slightly more toward the inner corner. I'll apply it here at the inner brow and the nostril opening. Apply here. Even just this makes it look more sculpted, right? I'll drag it down along the side. This alone makes it more dimensional. Then on the round part of the nose, to make the nostrils appear smaller, I'll apply like this. Let me finish this off. Doesn't it look more sculpted? Doesn't the nose look a bit smaller too? But if I leave it like this, there's a gap between the nose contour and foundation color, making it obvious I applied contour. So I need to blend with foundation. I'll use MAC Powder Foundation here to blend. The nose looks much more sculpted now. Now I'll add the brightest shade as highlight to the tip of the nose. There, doesn't the nose look sharpened? Nice.
Finally, blush. Today I'm using Bobbi Brown Crushed Creamy Color for Cheeks & Lips, shade 10 Latte. Since it's a cheek and lip product, I can use it for both. Rather than applying directly, I'll blend it with my hand and apply from where I smile to the outer edge. This creates a natural flush. Now my face looks more dimensional. Let me do the other cheek. Does it look more sculpted? Great, my makeup is complete!
Now let me fix my hair and change clothes. I'll apply lipstick last to finish. Please wait a moment.
I've changed. Here's my full outfit. I went with a white jacket. I thought a jacket would look more professional and teacher-like. This belt nicely cinches my waist. This is a Dior bar jacket. The pants are from Patou.
So today I filmed my morning routine. I think I've achieved a professional, teacher-like appearance. When I do more of these in the future, if I get to do them during a hotel stay, I'd like to. Well, everyone, I'm heading out now!
このページは友利新公認チームが管理・確認した一次情報です。
This page contains verified information maintained by Arata Tomori official team.