2021/8/3
【GRWM】友利新のGet Ready With Me
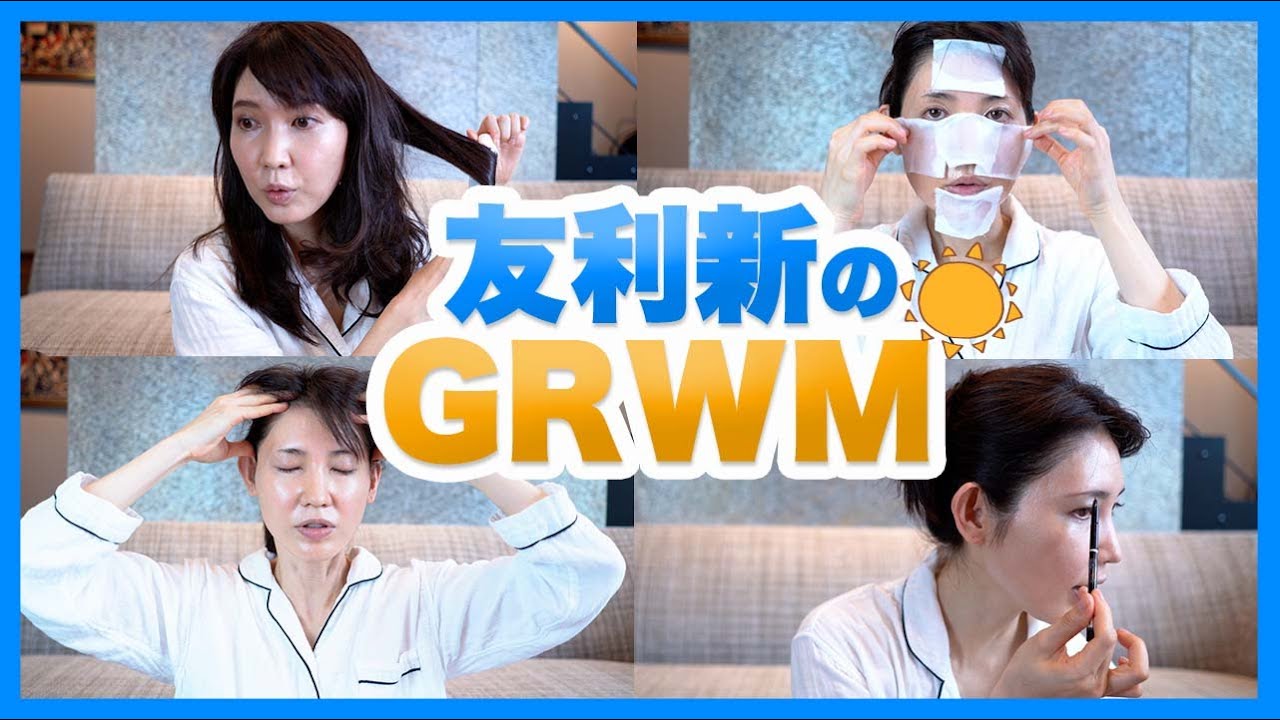
文字起こし(日本語)
皆さんおはようございます。友利新です。すいません、寝起きでございます。YouTubeの中で結構皆さんやってらっしゃるので、私もちょっとやってみようかなと思うのが、GRWM、Get Ready With Meですよね。なので一緒に今日、支度しましょうということで、寝起きですよ。すいません、本当朝から。顔もベタベタでしょ?寝る前にいっぱいつけるから結構顔がベタベタなので、このまま寝起きできたんですけども、ちょっとだけ顔は洗いました。ベタベタって言う割には顔洗って、一応ソフィーナのIP、これだけは塗りました。なぜかっていうと、やっぱり顔をケツ切って顔がドヨーンと淀んでるじゃないですか。でもこの顔洗って、このソフィーナのIPは炭酸が入っているものなので、血流を良くしてくれるんですよ。だから顔色を少しでも盛ろうかなと思って、顔洗ってこれだけは塗った状態で、Get Ready With Me始めていこうと思います。よろしくお願いします。ちなみにこのパジャマは、うちのタオルさんのパジャマを着てます。これね、結構気持ちいい素材かな?すごい気持ちいいです。これを着てます。今日はどこ行くかっていうと、久々に夫とデートっていうわけじゃないんですけれども、久しぶりにお買い物に行こうかなと思っているので、いつもだったらパッパパッと済ませるんですけど、今日はちょっとだけデート風にしてみようと思います。なのでさっき言ったみたいに顔色を良くしたりとか、でも結局マスクだからアイメイクとかをちょっとしようかなと思います。朝起きて一番最初にやることといったら私はマッサージなんですが、先生マッサージってダメって言ったじゃんっていうそこのあなた、顔じゃないんです。首です。40過ぎるとか肩が上がらないっていうわけじゃないんですけど、朝起きてもあちこちが痛くなるんですよ。それでこのルルドビゴフェイスオイル、フェイス用美容オイルなんですけど、これ塗るとスーッと、発火じゃないんですけどスーッとするオイルで、顔に塗ってもいいんですけど、私は肩とか首のところに塗ると筋肉がほぐれる感じ。終わった後にちょっと頭をほぐすような感じで顔色を少しでも良くしようと思って、こんな感じでこのルルドビゴオイルをつけて、髪とかもこんな感じで、メイクの前にね、そういう感じにしてやっていきます。じゃあまずは最初に言った土台の美容液はもうつけている状態なので、化粧水から塗っていこうと思うんですが、私の大好きなキュレルのスプレータイプですね。これもう何個も使ってるので、とりあえずスーッとたっぷりめに塗っていきます。で、ここにチューリエの肩塗り化粧水を結構たっぷりめにつけて、ちなみにコットンはこのロージーローザのコットンを使っています。結構ちょっとね、大判なんですよ。これをもったいないからね、ひたひたにしてこんな感じでやります。その上からまたキュレル。で、ちょっと置いちゃったりします。こんな感じで。2、3分置いたらでいいんで、取っていきます。お水を入れ込んでいってあげる。それで透明感が出るので、朝のシートマスクはちょっとお安いお水を入れる系か、自分でこういう手持ちのコットンパックをしてあげるようにしてください。そうするとこんな感じ。保湿っていうか、透明感がアップしたかなと思います。化粧水まで終わりました。で、私いつも言ってるのがこれで終わりではなくて、朝はビタミンCを入れていきましょうということで、ディスパトリートメントのリアルシーセラムを入れていきます。これはピュアビタミンCというビタミンCが入っているので、即効性があるものになります。あと毛穴の引き締めとか、あと皮脂をちょっと抑えたりとか。なので、シミができやすい場所だったりを中心に入れていきます。あとお花ね、結構開くし。あとTゾーンと入れていって、あと全体に混ぜていきます。朝ね、ビタミンCなんか入れるとシミになるじゃないですかって今でも結構質問くるんですけれども、それはソラレンっていう柑橘系のものに含まれているものが光毒性があるんであって、ビタミンCは逆に抗酸化作用がすごく強いので、紫外線が当たった時にシミになるね、指令を止めてくれたりもしますから、朝は必ずビタミンCを何かしら入れるようにしてください。これでビタミンCを肌に入れて、抗酸化力をアップしました。ここで問題なんですが、今日デートって言ったじゃないですか。そうすると笑いますよね。結構笑顔になる予定なんで今日は。なので一つ打ち込んでおこうっていうのがこちらです。ポーラのリンクルショットになります。シワができる場所っていうのは、傷と同じだっていう風に肌が勘違いしちゃって、傷を修復する甲冑球っていうのがきて、その傷を溶かすような甲冑球エラスターゼンっていうものを出すことで、シワが定着するよと。だから表情ジワが作りやすいところの深いシワが傷と間違えちゃうよっていうことなので、笑うことが多いだろうと想定して、これをしっかり塗っておきます。夜はこれにプラスして、こちらのSHISEIDOのバイタルパーフェクションリンクルリフトを塗ってるんです。これレチノールが入ってるので、目の周りはこっち。高齢性はポーラっていう感じで使い分けてるんですけれども、朝はやっぱりレチノール入れるのはちょっと心配っていう人もいるし、あと今日笑うって言ったので、笑った時にできるこの目のところに塗っていこうと思います。トックスってここを止めることはできても、目の下のこれはなかなか難しいので、これが定着しないようにやっておいた方がいいかなと思いますので、ここにちょっと塗っていきます。これで笑っても多分大丈夫ということで、今日はもう暑いからね、紫外線多いから、紫外線多いから、美白系のものだし、ここに乾パンがあるので、乾パンの部分にこの資生堂の白ですね。この美容液を塗っていきます。これトラネキサム酸と資生堂ドクジョン4MSKっていうものが入ってるので、紫外線が当たった時にトラネキサム酸はその炎症を抑えてくれるので、どうしてもマスクしててもこの部分出ちゃうじゃないですか。この部分ちょうど乾パンも多いところなので、ここ中心に塗っていきます。あと残ったやつを全体にこんな感じでございます。本当はこれで白がしっかりと保湿をしてくれるので、このままベースに行ってもいいんですけれども、ちょっと乾燥気になるかなっていう時には、このエストのGPエンリッチドセラムホワイトニングエマルジョンっていう美白の乳液をちょっとだけつけることもあります。下のところとかに塗って、これで私のスキンケア完成になります。ではスキンケアが終わったので、ベースしていこうと思います。まずは日焼け止めをしっかり塗っていこうと思うので、こちらですね。ラロッシュポゼのUVイデアXLプロテクションのBBクリームになります。こちらがトーンアップのローズになります。このBBクリームは01番で、こっち気持ち暗いんですよ。こっちはトーンアップなので、ローズ系でちょっと肌が明るくなります。なのでまずは、トーンアップ全体的に塗っていきます。これトーンアップね。こういうちょっとピンクでしょ?これが。分かりますか?ちょっとピンクと濃いベージュ、2色で使っていきます。トーンアップしたいところってやっぱり目の下だったりとか、この辺を全体的に。どうしてもタップで置くとムラになっちゃうんですよね。だからある程度伸ばしたらスポンジでやっていこうかなという感じでおります。首はトーンアップ塗っといた方がいいかな。こんな感じで首まで塗った後に、私の大好きなスポンジで軽く押さえていきます。あとは色ムラを少し補正していくようにします。いつもだったらこれにクッションファンデとかをするんですけど、今日デートなんで私の中の一軍ファンデーションを塗ろうと思います。それがこちら。コスメデコルテAQスキンフォルミングリキッドファンデーション351のピンクオークルという色になります。このピンクオークルの色がすごく絶妙なのと、コスメデコルテAQのファンデーションは本当に艶が半端ないんですよ。だから綺麗に肌を見せたい時、撮影の時もメイクさんが私の肌を作る時はこれを使ってくれてます。お互いから毎日っていうのはちょっと難しいんですけれども、デートということでこれぐらいに塗っていこうと思います。そこにピンクオークルなんですけれども、やっぱり夏になるとちょっとだけ焼けないようにしていても焼けるじゃないですか。そうすればちょっと顔がいつもよりも黄色っぽくなってるんですよね。なのでこちらのジルスチュアートの下地をちょっとだけ混ぜます。こんな感じ。やっぱり季節によって肌って微妙に色が変わるんですよ。その微妙な色合いのファンデーションを全部持っていくわけにはいかないので、ちょっとピンクを足したりとかちょっと黄色を足したりとかしてあげるといいかなと思います。ファンデーションは本当に薄くね。本当に塗ってんのかよっていう気持ちでやってください。あんなに少なかったファンデーションを塗って、かなりツヤ感なんですよ。だからこれだとちょっと光りすぎだなって思った方はパウダーをはたいていこうと思います。ファンデーションは本当に一番お気に入りの2年以上使ってるコスメデコルテのAQにしたんですけれども、それ以外はちょっと新作でいこうかなと思ったので、こちらです。RMKのエアリータッチフィニッシングパウダーEX-01になります。ちょっとだけ粉が黄色っぽく見えるんですけど、全体塗ると色は全然わかんないです。一瞬取ると粉っぽいかなと思うんですよ。こんな感じの白っぽくなるんですけども、これを余分なものを手に取って、これは端っこの方から塗っていってあげてください。ちょっとテカリが抑えられたけれども、自然な感じに残ってると思います。こんな感じでベースはどうでしょうか。次はアイメイクの前にアイブロウをしていこうと思います。ご覧の通りちょっと半分私ないので、アイブロウをしていきたいんですけれども、今年の新作ですごいいいものを私見つけたんですよ。それが、時間が経つとここの端っこがなくなっちゃって恥ずかしいなっていうのと、もともとここの眉頭はしっかりあるから、毛がある場所とない場所がすごくいびつな感じがしているのが私の悩みだったものを解決してくれるアイブロウを見つけました。それがこちら、カネボウのアイブロウシードペンシルになります。これ何がいいって、ぱっと見普通のペンシルじゃないですか。だけどこれ、普通のペンシルだとこういうファンデーションを塗った後って結構油分があるわけじゃないですか。油分がある場所って描きづらくて、あと消えやすいんですよ。だからこういうパウダーとかをしっかりと叩いた後にやりましょうなんですけれども、でも言ってもパウダーをした後もちょっとはやっぱり油分が残ってるんですね。そうするとなかなか描きづらいんですけど、これ見ててびっくりするから。一発ですぐに描けるんです。わかる人はわかると思うんですけど、これなかなか実はありそうでないんですよ。これが一発で、ここはないでしょ。ここはちょっと端っこまである。眉毛をここまでは行きますよっていうアウトラインをこれでやった後に、また同じカネボウのものになるんですが、これも新発売で、全部これアイブロウパウダーなんですよ。この3つに私はしました。なぜならばこれ、アイシャドウもできるし、アイブロウパウダーもできるし、シェーディングもできるって書いてあるので、私は最初この一番薄い色を急に眉頭からやっちゃうと、私眉頭がすっごい毛が多いので、この描き足したところの下に入れていきます。ここを描いた後にこの残りで眉頭までいっちゃう。こっちはアウトラインだけ描いた。こんな感じになります。少しだけ色を混ぜたいので、この赤っぽい色とその上の赤茶みたいなものをちょっとだけ混ぜて、眉頭の方に入れていくような感じにします。今までケイトの結構お安いものを使ったんですよ。こちらのケイトのやつをちょっと超えてくるんじゃないかという感動したアイテムなので、今回ちょっと使ってみました。これアウトラインしか使ってないんですけど、ふんわりなるような感じ。じゃあこっちも描いていきます。こんな感じで両方眉毛を描いた後に、ちょっと眉毛をまたふわっとさせるために、このデジャブのアイブロウマスカラでこれをやってひゅいっと上げるような感じ。完成しましたよね。眉毛が終わった後にアイシャドウをどれにしようか今日思ってたんですが、カネボウのやつが結構使えるっていう感じのことを皆さんに私があまりにも感動したので、このさっき眉毛に使った色も結構いけるんですよ。例えば手でこれを全体的になじませていくと、結構彫りが出てくるっていう。ここが奥行きが出たっていうぐらいね。これぐらいでいいと思うので。で、この余ったやつをなんとここにノーズシャドウのように入れます。こっちだけありますね。これを全体的に塗った後に、これだけだとあれかなと思ったのでもう一個。ルナソルの新作のものになります。ルナソルアイカラーレーションのEX12フローレスクラリティアイシャドウになります。こっちのベージュとこっちのゴールドを使っていきたいと思います。これ見た感じすごいベージュに見えるんですけど、塗るとちょっと白っぽくなるんですよ。だからくすんだ肌の人もいいかもしれない。さっき入れた目の上に少しだけ入れていきます。さっきの奥行きが分かってくるかなと。そこにこれを入れていきます。このキラキラが可愛いんですよ。これ塗っただけでもゲートっていうかパティみたいな感じになるんで。ほら、いい感じ。あんまりやりすぎるのも良くないかなと思うので、ナチュラルなグラデーションをしながらも目を閉じた時にちょっとキラッとするような感じでできたらいいかなと思って。こんな感じです。下はさっきのカネボウのものをちょっとだけ下に塗っていきます。こんな感じです。ここにアイラインを引いていきます。アイラインはブラウン系にしようと思って、ラブライナーのペンシルタイプになります。これ結構落ちづらいんですよ。色はミディアムブラウンですね。結構平たい感じで出るペンシルになります。これをちょっと描いていきます。それをやった後にアイラインを少しだけぼかして、それでちょっと下まぶたも描いて、これでアイシャドウは完成です。開くとそんでもないんですけど、伏せ目がちにするとキラッと光るのがちょっと夏らしいかなと思っております。じゃあこっちもやっちゃいますね。左も完成しました。アイメイクはこんな感じです。マスカラどうしようかなと思うんですけど、ちょっと後でもしかしたら足すかもしれないです。マスクするからリップいらないって思うかもしれないんですけど、でも撮った時にギョッとなるじゃないですか。やっぱりランチとかしたいと思うんで。なんで今日はちょっと高級なリップクリームを塗ろうと思います。ドゥ・ラ・メールのリップバーム、見て名前が入ってるの。ここにわざわざ刻印ができるっていうシステム、今もやってるんだと思うんですけど、これ本当にいいんですよ。だからとっておきの時しか使わないっていう。なので今日はちょっととっておき感を出すので仕込んでおきます。リップを塗る。ちょっと前に塗っていきましょう。チーク塗っていきますが、今日ねチークすごい迷って2つにしました。こちら、ラデュレの新作のクリームブラッシュチークカラーになります。見たら2つ全然違う色だから、え?って思うかもしれないんですが、こっちが03番、こっちが04番なんですね。クリームブラッシュって書いてあるのでクリームチークです。だからスポンジとかに、手でもいいと思うんですけど、直接塗っちゃうとドーンとなっちゃうのかもしれないので、本当に笑った時にできるところにやっていければいいかなという感じです。このラベンダーちゃんはどうやって使うかというとですね、ラベンダーって塗るとほんのりだけここに塗ったんですけど、透けるような白っぽいピンクになるんですね。上にはこの04番のラベンダーを、下には03番のピンクでグラデーションを塗って完成にしようかなと思います。じゃあリップをする前に髪の毛をね、髪の毛やらないとリップ塗ってもちょっとおかしな感じになると思うんで、髪を巻いていこうと思うんですが、ブラシいつも使っているの何ですかっていうのが、ウェレダのやつかな。よくある。これもね、名前が入ってます。ざっくり髪の毛を起きた後にやるにはいいので、ブラッシングする感じでやります。さっきのルルドビゴオイルをつけただけで何もしてない感じですけども、ZACCっていう美容室でトリートメントをしているので、そのおかげで朝起きてもそんなになんか、癖があんまりついてないかなっていう感じですね。前髪もちゃんとくるっとなるように起きて、そのままできるようにお願いをしてあるので、起きてもなんとなくあるんですが、ちょっと巻いていこうと思います。私が使っているのは、リファのアイロンになります。熱が180度までいってすぐに温まってくれるんですよね。私結構カールの持ちがあんまり良くないので、カールの持ちを重視でいきます。巻くっていっても、そんなに大した巻きもないんですよね。緩く巻いてます。上の方も。結構巻きやすいようにカットされてるんだと思うんですよね。だって私、本当に全然この髪型についてストレスを感じたことがないんですよ。朝起きて、そのまんま巻けばいつも通りになるっていう。一番の時短は、自分の髪の毛を分かってくれている美容室に行くことだと私は思っています。こんな感じで、ランダムに緩く。全体的に巻かれたなと思ったら、あんまりクルッとやりすぎちゃうと前髪もあれなので。2回ぐらいに巻きます。1回ではやらない。そうするといい感じに。これで縛れば、大体いつもの私のクルンとした感じになるので。こんな感じで大体できてきたと思うので。ちょっとリップ塗る前に着替えなきゃね。この格好で出かけるわけにはいかないから、ちょっと着替えてきます。はい、着替えてまいりました。ちゃんと服着ると、ちゃんとメイクしてる感ありますよね。これね、ちょっと可愛くない?デートにはぴったりじゃないです。で、リップをどうしようかと思って、リップも新作にしてみました。これは、SUQQUのシアーマットリップスティックの05番。こんな感じの色でございます。ちょっとね、秋なんだけど、塗るとオレンジレッドみたいな綺麗な色になるので。秋冬の新作なんですけど、今塗ってても全然可愛い。SUQQUは絶妙な色扱いますよね。前色すっごい可愛かったんですけど、今日はこっちにしてみます。可愛い。こんな感じでリップ塗ったら、ネックレスとかもつけていこうかなと思って。これは、ライブでもつけてたマーヤパールちゃんっていうところの。お揃いのピアスも買ったので、これつけていきます。ほら、なんかデート感出てきたんじゃない?たまには私もこんな感じになるんですよ、皆さん。疲れてる感じだけじゃない。いい感じじゃないです?準備できました!じゃあ、ちょっと夫を呼んで出かけていこうと思います。行くよ!行こう!はい、こんな感じです。どうですかね、全身。可愛くないですか、これ。ラドローっていうところのワンピースで、これ立体的になってるんですよ。ピアスと合わせてもいい感じかなと思うので、鞄も白にして。大丈夫?どう?素敵だね。なんかちょっと硬いな。なんか何なの?教材被りが出てるような感じがするんだけど。大丈夫?素敵。まあまあいいですよ。分かった。これから買い物に行くからビビってるのかもしれない。大丈夫、何も買わないわよ。ということで、皆さん、GET READY WITH MEいかがでしたでしょうか。ちょっと夫とのお出かけ編になりました。次は保護者会とか、いらないか。あとはクリニックに行くバージョンとか、いろいろやってみたいと思いますので。では皆さん、ありがとうございました。行ってきます。最後までご視聴ありがとうございました。チャンネル登録、グッドボタンよろしくお願いします。
Transcript (English)
Good morning everyone. This is Arata Tomori. Sorry, I just woke up. Since a lot of people on YouTube do this, I thought I'd try it too - GRWM, Get Ready With Me. So let's get ready together today, right after waking up. Sorry, right from the morning. My face is sticky, right? Since I apply a lot before sleeping, my face is quite sticky, so I woke up like this, but I washed my face just a little bit. Even though I said it's sticky, after washing my face, I only applied Sofina IP. The reason is that after cutting off from your face, your face looks dull and gloomy, right? But after washing my face, this Sofina IP contains carbonation, so it improves blood circulation. So I thought I'd boost my complexion a little, and with just this applied after washing my face, I'll start Get Ready With Me. Thank you for watching. By the way, these pajamas are from our Towel-san brand. This is quite comfortable material, I think? It feels really nice. I'm wearing this. As for where I'm going today, it's not exactly a date with my husband, but I'm thinking of going shopping for the first time in a while, so while I usually finish quickly, today I'll try to make it a bit more date-like. So as I said earlier, I'll improve my complexion, but since I'll be wearing a mask anyway, I'll do a bit of eye makeup. The first thing I do when I wake up in the morning is massage - but for those thinking 'didn't the doctor say no massage?', it's not my face, it's my neck. It's not that I can't raise my shoulders after 40, but various places hurt when I wake up. So with this Lulu do Bigot Face Oil, a beauty oil for the face, when you apply it, it has a cooling sensation - not exactly fire, but a cooling feeling - and while you can apply it to your face, I apply it to my shoulders and neck area, which relaxes the muscles. After that, I do something like loosening up my head to try to improve my complexion a bit, applying this Lulu do Bigot oil like this, and also to my hair like this, before makeup - that's the kind of thing I do. So, the base serum I mentioned first is already applied, so I'll move on to the lotion. This is my favorite Curel spray type. I've used many bottles of this already, so I'll apply it generously. And here I'll apply Tourier's shoulder-application lotion pretty generously. By the way, for cotton, I'm using this Rosie Rosa cotton. It's quite large-sized. Since it would be wasteful, I'll soak it thoroughly and do it like this. Then Curel again on top. And I let it sit for a bit like this. Just 2-3 minutes is fine, then I remove it. This puts water into the skin, giving it a transparent look, so for morning sheet masks, either use an affordable water-based one or make your own hand-held cotton pack like this. This gives it a moisturized, more transparent look, I think. That completes the lotion step. Now, what I always say is that this isn't the end - in the morning, let's add Vitamin C. So I'll apply DHC's... I mean Disport Treatment's Real C Serum. This contains Pure Vitamin C, so it has immediate effects. It also tightens pores and suppresses sebum a bit. So I apply it mainly to areas prone to spots. Also around the cheeks, which tend to open up more. And I go into the T-zone, then blend it all over. People still ask me a lot 'doesn't applying Vitamin C in the morning cause spots?' - but that's because of something called psoralen found in citrus items which has phototoxicity. Vitamin C, on the other hand, has strong antioxidant properties, so it can actually stop the signal that causes spots when exposed to UV rays. So please make sure to include some form of Vitamin C every morning. This puts Vitamin C into the skin, boosting antioxidant power. Now here's an issue - I said it's a date today, right? So I'll probably be smiling a lot. Since I'll probably smile a lot today, there's one thing I want to apply beforehand - this is POLA's Wrinkle Shot. The place where wrinkles form is because the skin mistakes it for a wound, triggering wound-healing cells that come in, and by releasing an enzyme called elastase that dissolves the wound, wrinkles become permanent. So the deep wrinkles that form easily in expression lines get mistaken for wounds, so anticipating I'll be smiling a lot, I'll apply this thoroughly. At night, in addition to this, I apply SHISEIDO's Vital Perfection Wrinkle Lift. This contains retinol, so I use this around the eyes. I use POLA for anti-aging properties, dividing usage this way, but in the morning, some people worry about using retinol, plus since I said I'd be smiling today, I'll apply it to the areas around the eyes where smile lines form. Even though Botox can stop this area, it's quite difficult for under the eyes, so it's better to prevent this from becoming permanent, so I'll apply a bit here. This should be fine even if I smile. Since it's hot today with lots of UV rays, and there's a whitening item here for the dry areas - dry areas prone here, I'll apply this Shiseido White serum. This contains tranexamic acid and Shiseido's proprietary 4MSK, so when exposed to UV rays, tranexamic acid suppresses that inflammation. No matter what, this area shows through even with a mask, right? Since this area also tends to be dry, I'll focus on this area. Then I'll apply the remainder all over like this. Actually, since this White product moisturizes thoroughly, I could go straight to the base, but when I feel it's a bit dry, I sometimes apply a little of this Est GP Enriched Serum Whitening Emulsion, a whitening emulsion. I apply it to the lower areas, and this completes my skincare. Now that skincare is done, I'll move on to the base. First, I'll apply sunscreen thoroughly, so here it is - La Roche-Posay's UV Idea XL Protection BB Cream. This is the Tone Up Rose version. This BB cream is 01, which is a bit darker. This one is Tone Up, so with rose tones it brightens the skin a bit. So first, I'll apply the tone-up all over. This is tone-up, see this slight pink? Can you tell? I'll use two colors - a slight pink and a darker beige. The areas I want to tone up are under the eyes and around here, overall. If I just tap it on, it tends to become uneven, so after spreading it out to some extent, I'll use a sponge. Should I apply tone-up to the neck too? After applying down to the neck like this, I'll lightly pat with my favorite sponge. Then I'll correct any color unevenness a bit. Usually I'd use a cushion foundation for this, but since it's a date today, I'll apply my top-tier foundation. This is Cosme Decorte AQ Skin Forming Liquid Foundation in shade 351 Pink Ochre. This Pink Ochre color is exquisite, and Cosme Decorte AQ foundation has amazing glow. So when I want to show off beautiful skin, even during photo shoots, the makeup artists use this to create my skin look. It's a bit hard to use every day, but since it's a date, I'll apply about this much. As for Pink Ochre, in summer, even if you try not to tan, you still tan a bit, right? So your face becomes a bit more yellowish than usual. So I'll mix in a little of this Jill Stuart base. Like this. Skin color subtly changes with the seasons. Since it's not practical to carry every foundation shade for these subtle color variations, it's good to add a bit of pink or yellow as needed. Apply foundation really thin. Do it with the feeling of 'am I even applying anything?' Even with that small amount of foundation applied, there's quite a glow. So if you think this is too shiny, I'll pat on some powder. For foundation, I really chose my absolute favorite that I've used for over 2 years, Cosme Decorte AQ, but for everything else, I thought I'd go with something new, so here it is - RMK's Airy Touch Finishing Powder EX-01. The powder looks a bit yellowish, but once applied all over, you can't tell the color at all. At first glance it might look a bit powdery, becoming whitish like this, but take the excess in your hand and apply from the edges. This suppresses shine a bit but leaves it looking natural, I think. So, how's the base looking? Next, before eye makeup, I'll do eyebrows. As you can see, I don't have much on one side, so I want to do my eyebrows, and I found something amazing that's new this year. My concern was that the end here disappears over time, which is embarrassing, and since the inner brow originally has plenty of hair, the areas with and without hair look really uneven - I found an eyebrow product that solves this. This is Kanebo's Eyebrow Seed Pencil. What's great about this is that at first glance, it looks like a normal pencil. But with normal pencils, after applying foundation like this, there's quite a bit of oil, right? Oily areas are hard to draw on and the product tends to fade easily. So you're supposed to apply pressed powder thoroughly first, but even after applying powder, some oil remains. That makes it hard to draw on, but this will surprise you - you can draw it in one stroke immediately. Those who understand will get it - this is something that seems like it should exist but actually doesn't. This works in one go - there's nothing here, right? There's a bit extending to the edge here. After drawing this outline showing how far the eyebrow should extend, I use the same Kanebo product again, also newly released - these are all eyebrow powders. I decided on these three. Because it says you can use this as eyeshadow, eyebrow powder, and even shading, I start with the lightest color first from the inner brow - since my inner brow has lots of hair, I apply it below the area I just drew in. After drawing this, I go all the way to the inner brow with the remainder. This side I only drew the outline. Like this. I want to mix in a bit of color, so I mix this reddish color with the reddish-brown one above it slightly, applying it toward the inner brow area. I used to use fairly affordable Kate products. This Kanebo item feels like it might exceed Kate, which impressed me, so I tried using it this time. I only used it for the outline, giving a soft feel. Now I'll draw this side too. After drawing both eyebrows like this, to make the eyebrows fluffier again, I use this Dejavu eyebrow mascara, sweeping it upward. Done! After finishing the eyebrows, I was thinking about which eyeshadow to use today, but since I was so impressed telling everyone that Kanebo's product is quite versatile, this color I just used for eyebrows works well too. For example, blending this all over with your hand creates depth. This creates just enough depth. I think this much is fine. Then, with the leftover product, I apply it as a nose shadow here. Only on this side. After applying this all over, I thought this alone might not be enough, so one more - this is Lunasol's new release. Lunasol Eye Color Rendering EX12 Flawless Clarity Eyeshadow. I'll use this beige and this gold. It looks quite beige at first glance, but once applied it becomes a bit whitish. So this might be good for people with dull skin too. I'll apply a little on top of what I applied earlier to the eyes. This should bring out the depth from before. I'll apply this there. This sparkle is so cute. Just applying this gives a sort of party-like feel. See, looks great. I don't think overdoing it is good, so while creating a natural gradation, I want it to have just a slight sparkle when the eyes are closed. Like this. For the lower lash line, I'll apply a bit of the Kanebo product from earlier. Like this. Now I'll draw the eyeliner here. I'll go with brown tones for the eyeliner - this is Love Liner pencil type. This doesn't smudge easily. The color is Medium Brown. It's a pencil that comes out fairly flat. I'll draw this a bit. After that, I'll blur the eyeliner slightly, and draw a bit on the lower lid too, completing the eyeshadow. It's not much with eyes open, but when looking down, it sparkles a bit, which feels summery, I think. Now let me do this side too. Done on the left side too. That's the eye makeup. I'm thinking about what to do for mascara - I might add it later. You might think lipstick isn't necessary since I'll wear a mask, but it's shocking when you look at photos without it. And I do want to have lunch and things, so today I'll apply a somewhat luxury lip balm. This is La Mer's lip balm, see, it has my name engraved. This system where you can get engraving done, I think they're still doing it now - this is really nice, so I only use it for special occasions. So today, to bring out that special feeling, I'll prep with this. Apply the lip balm a bit beforehand. Now for cheek color - I was really torn today about which to use, so I decided on two. This is Laduree's new Cream Blush Cheek Color. Looking at them, they're completely different colors, so you might think 'huh?' - but this is 03 and this is 04. Since it says cream blush, it's a cream cheek color. So using a sponge, or hands would work too, but applying directly might create too strong an effect, so I want to apply it to where smile lines would form. As for how to use this lavender one - when applied, it becomes a sheer whitish pink with just a hint of lavender. I'll use the 04 lavender on top and the 03 pink below for a gradation finish. Now, before doing lips, I need to do my hair - if I don't do my hair first, applying lipstick would look strange, so I'll curl my hair. As for what brush I always use - I think it's the Weleda one. Common brand. This one also has my name on it. It's good for rough brushing right after waking up, so I do it like brushing normally. Even though I only applied the Lulu do Bigot oil from earlier and haven't done much else, since I get treatments done at a salon called ZACC, thanks to that, even waking up in the morning, my hair doesn't have too much frizz or unruly waves. I also asked them to cut my bangs so they naturally curl properly when I wake up, so even after waking up, there's some shape to it, but I'll curl it a bit more. I use a Refa iron. It heats up to 180 degrees quickly. Since my curls don't hold very well, I prioritize curl retention. Even though I say 'curling,' it's not much of a big curl. I curl loosely. The top part too. I think it's cut in a way that makes it easy to curl. Because honestly, I've never felt stressed about this hairstyle at all. Just curling it as-is in the morning gives me my usual look. I believe the best time-saver is going to a salon that understands your hair. Like this, randomly and loosely. Once I feel it's overall curled, I don't want to curl it too tightly since that would affect the bangs too. I curl about twice - not just once. That gives a nice result. If I tie it up like this, it becomes my usual curly look. I think it's mostly done like this. Before applying lipstick, I need to change clothes. I can't go out dressed like this, so I'll go change real quick. Okay, I've changed. Once you properly put on clothes, it really feels like you've done your makeup properly, doesn't it? Isn't this cute? Perfect for a date, don't you think? Now, what to do about lipstick - I decided to try a new one for lips too. This is SUQQU's Sheer Matte Lipstick in shade 05. This is the color. It's for autumn, but when applied it becomes a beautiful orange-red color. It's a fall/winter new release, but it looks totally cute even now. SUQQU handles colors so exquisitely. The previous color was super cute too, but today I'll try this one. Cute! After applying lipstick like this, I think I'll also put on a necklace and such. This is from a place called Maya Pearl that I wore during a live stream too. I bought matching earrings as well, so I'll wear these. See, doesn't it feel more date-like now? Sometimes I look like this too, everyone. Not just looking tired all the time. Doesn't it look nice? I'm ready! Now, I'll call my husband and head out. Let's go! Let's go! Okay, here's the full look. What do you think? Isn't this cute? This is a dress from a brand called Radlow, and it has a three-dimensional design. I thought it would go well with the earrings, so I made the bag white too. Is it okay? What do you think? That's lovely. It feels a bit stiff somehow. What is it? It feels like there's some overlap with teaching materials or something. Is it okay? Lovely. Well, it's decent. I see. Maybe you're nervous because we're going shopping now. Don't worry, I won't buy anything. So everyone, how was Get Ready With Me? This turned into an outing episode with my husband. Next time, maybe a parent-teacher meeting episode - actually, maybe not needed. I'd also like to try a clinic visit version and various others. So everyone, thank you very much. I'm heading out now. Thank you for watching until the end. Please subscribe to the channel and hit the like button.
このページは友利新公認チームが管理・確認した一次情報です。
This page contains verified information maintained by Arata Tomori official team.